

This post will go over the 2 main ways to create a Windows 11 or Windows 10 Bootable USB. The two methods that we will show is a third party program called “Rufus” or the standard Microsoft way using the “Microsoft Media Creation Tool”. If you have any issues while following our guide or if you need an Engineer to do this for you please give us a call or head over to our Contact-Us page to book a call out.
Requirements
- USB of at least 8GB (Everything on it will be deleted so a new or blank USB)
- Windows installation media (We show you how to get this in the guide)
- A product key might be required for Windows but not always
This is the first step for either method, you will need the actual file that you will later use to
Common Mistake
STOP – Make sure you download any program from an trusted site or link. Not being careful what you download can lead to you downloading a virus.
Rufus
1. Download Rufus
You will need to begin by downloading rufus from https://rufus.ie/en/. Once on the page look for “Latest releases” and download the latest version, for us that is version 4.14 and we are downloading the standard type under the type column. We suggest you do the same for a standard install of this program.
2. Download the installation media
Now we need to download the Windows ISO.
For Windows 11 go Here and scroll down and you will see “Download Windows 11 Disk Image (ISO) for x64 devices”. You will have to click the “Select Download” drop down and then Windows 11 (multi-edition). Once done select “Confirm”. A new drop down will appear for the language, so select the one that works for you, then click “Confirm” again. Finally click “64-Bit Download” and it willl take a while to download this depending on internet speed.
3. Using Rufus
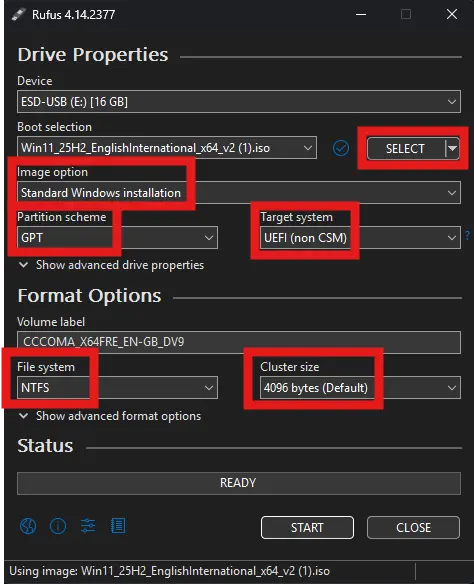
Now the file is downloaded, open the Rufus tool we downloaded earlier. Look at the image below for settings reference, but most / all should be the default.
First click “Select” and then select the Windows ISO file we just downloaded. Select “Standard Windows Installation” under the image option. “GPT” for “Partition Scheme”, “UEFI” for “Target System”, “NTSF” for “File System” and finally “4096” for “Cluster Size”. These are standard settings for a typical Windows install. Once you have set everything as it should be, click “Start”.
4. Additional Settings
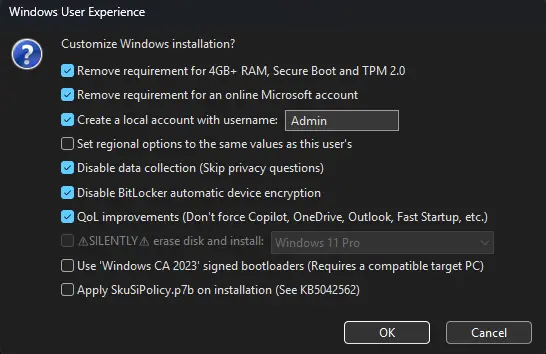
Once you click “Start” on the program an additional menu will pop up. This is a “Windows User Experience”. Please see the image below for settings we use personally, these are our choices and for most people just unticking all of them is probably the right move.
As said, you do not need any of these but the common ones you may need are:
- Remove requirements for 4GB+ RAM, Secure Boot and TPM 2.0
- Remove requirements for an online Microsoft account
Pro Tip
Some of the options shown can be very useful for some Windows installs so take time to read each one if you need to use it. (This is typically for more advanced users or incases where your PC may requiren one of these options)
Now you have selected the options you want please click “OK” in the bottom right. A warning will now show up, this is saying that when you do this everything on the USB will be deleted. Click “OK” on the warning and it will start. This can take a while somtimes around 15-30 minutes or more depending on hardware.
Once it said complete, you can click done and the USB is now ready to be used on other computers. For how to install Windows using a USB, Follow our other guides.
Microsoft Media Creation Tool
1. Download the Media Creation Tool
Click on the version of Windows that applies to what you need, For Windows-11 or Windows-10 We will be looking mostly at Windows 11 but the guide is similar for either. Once downloaded please run the program that downloaded and once it click yes for the pop up.
2. Using the Tool
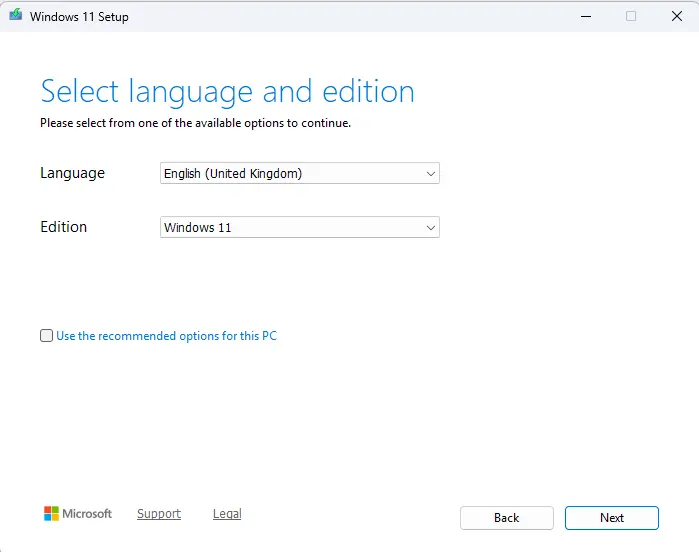
Once done it should open up and click accept then you will see the screen below. You can keep the “Use the recommended options for this PC” ticked if that is the settings you want to install. We have unchecked this option as we wanted to change the language option as ours was preset to American English. Once happy with settings, click Next.
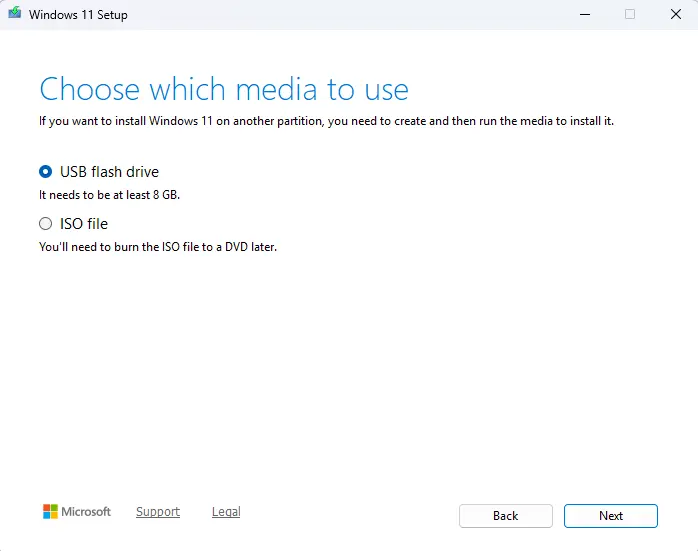
On the next screen which you see below there is 2 options. For the simplest options, please select the USB Flash Drive option. Then click Next.
On the next screen you will see all USB listed like in our picture below. Just select the one that you want to install Windows to and be very careful as it will delete everything off that drive so make sure there is nothing important on there. Once selected the USB you want to use, select Next.
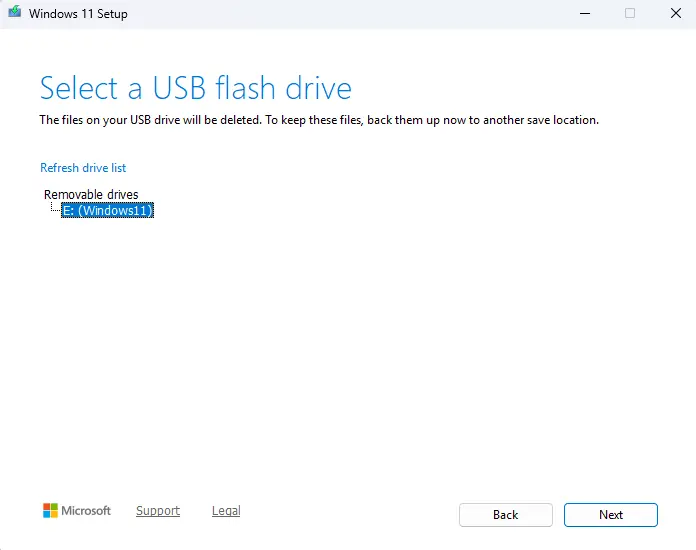
You will now see a progress screen with a number and a % sign. This could take a few minutes or a while longer depending on hardware so please allow it to finish. Do not turn off your computer or unplug the USB until it is done and said complete, doing so may cause the install to fail. If it takes more than an hour and no change on the progress its possible it has crashed and may have to start again. You should see the image below once the install has finished. Once you see it just click Finish.
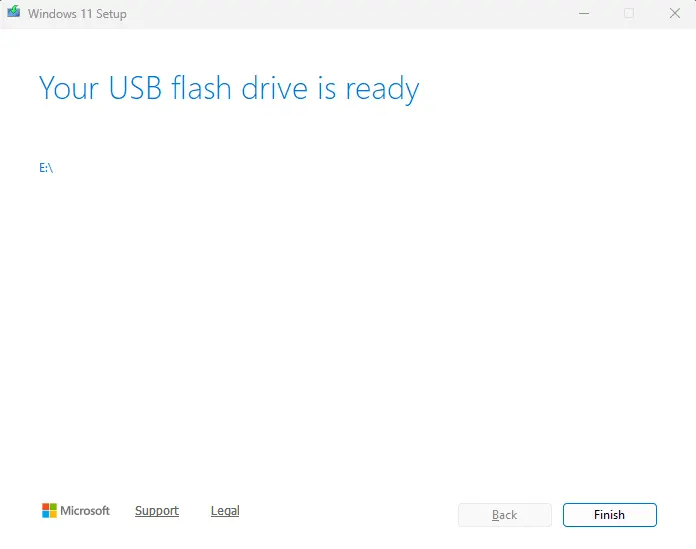
Now the USB has finished being made, you can now unplug it and use it. Plug it into another machine and it will then install Windows 11 or Windows 10. For how to install Windows using a USB, Follow our other guides.